How to Play the Kora: West African Harp-Lute Guide
I’ve spent years learning and teaching kora to students worldwide, and I’ll be honest: most beginners approach this instrument completely wrong. They buy a beautiful 21-string harp-lute thinking it works like a piano, then struggle for weeks trying to force conventional harp techniques that don’t work. The truth is, playing authentic kora requires understanding the traditional West African polyrhythmic approach that separates real players from tourists holding an expensive decoration. This guide shares my exact methodology for learning kora from day one, tested techniques that work for both complete beginners and musicians with prior instrument experience.
Understanding the Kora: More Than Just a Harp
The kora is a hybrid instrument combining characteristics of a harp, lute, and traditional West African stringed instrument, but it plays unlike any other instrument you’ve encountered. Most learners fail because they approach it like a European harp when it’s fundamentally an African percussion and melodic hybrid.
The kora features 21 strings (occasionally 22-25 in southern Senegal variants) arranged in two ranks along a double bridge. This dual-rank arrangement is crucial: it determines how strings organize under your hands and how traditional Mandinka patterns emerge naturally. The strings aren’t stopped or fretted like a guitar; they ring open like a harp. But unlike harps, kora playing involves intricate hand positioning using only your thumbs and index fingers while your remaining fingers anchor the instrument.
I consider the kora a percussion-melodic instrument because it produces both rhythmic ostinatos (repeated patterns) and flowing melodies simultaneously, creating the hypnotic polyrhythmic texture that defines West African music. Understanding this hybrid nature changes how you approach learning fundamentally.
Setting Up Your Kora for Comfortable Playing
Proper instrument positioning determines whether you develop good technique or pick up frustrating habits that prevent progress. I’ve seen students struggle for months simply because they positioned their kora incorrectly from day one.
The Traditional Playing Position
Sit upright with your kora held vertically between your legs, resting against your torso with the strings facing you. The instrument’s weight distributes evenly between your legs and chest. This position allows complete hand freedom while maintaining stability through your entire practice session.
Position the calabash resonator (the rounded body) against your chest, roughly at sternum level. The long wooden neck extends upward and away from your body at approximately a 45-degree angle. Your hands should reach the strings comfortably without stretching or slouching forward, which causes arm fatigue and tension.
Hand Post Positioning and Grip
The kora features two hardwood hand posts drilled through the calabash resonator. These posts are your primary grip points, not the strings themselves. I emphasize this constantly to beginners because hand post grip determines everything about your playing technique.
Grip both hand posts gently with your remaining four fingers on each hand (pinkies, ring fingers, and middle fingers). Your thumbs and index fingers stay completely free for string plucking. The grip should feel secure but never tense; tension in your grip transmits directly to your plucking hand, preventing fluid movement.
Position your hands so your thumbs sit roughly 6-8 inches from the bridge. This distance allows complete string access while maintaining proper control. Hands positioned too close to the bridge feel cramped; hands too far away create excessive reach distance.
The Fundamental Hand Positions and Finger Movements
Hand position and plucking technique separate authentic kora players from people randomly plucking strings. I spent months learning proper technique before attempting real traditional patterns, and this foundation proved invaluable.
The Thumb and Index Finger Plucking Method
Kora is played exclusively with your thumbs and index fingers using a plucking motion that originates from your hand, not just your fingers. This distinction matters enormously for developing proper technique and avoiding repetitive strain.
Pluck strings by curling your thumb or index finger toward your palm, then extending through the string. The string passes over your nail (not fingertip), creating a clean sound. This curling and extending motion comes from your hand and wrist, not just finger joints. This approach distributes effort across your hand, preventing finger fatigue during long practice sessions.
Your left hand typically handles bass patterns while your right hand covers melody and improvisation. But begin by practicing single-hand patterns before coordinating both hands together.
Left-Hand Bass Pattern Foundation
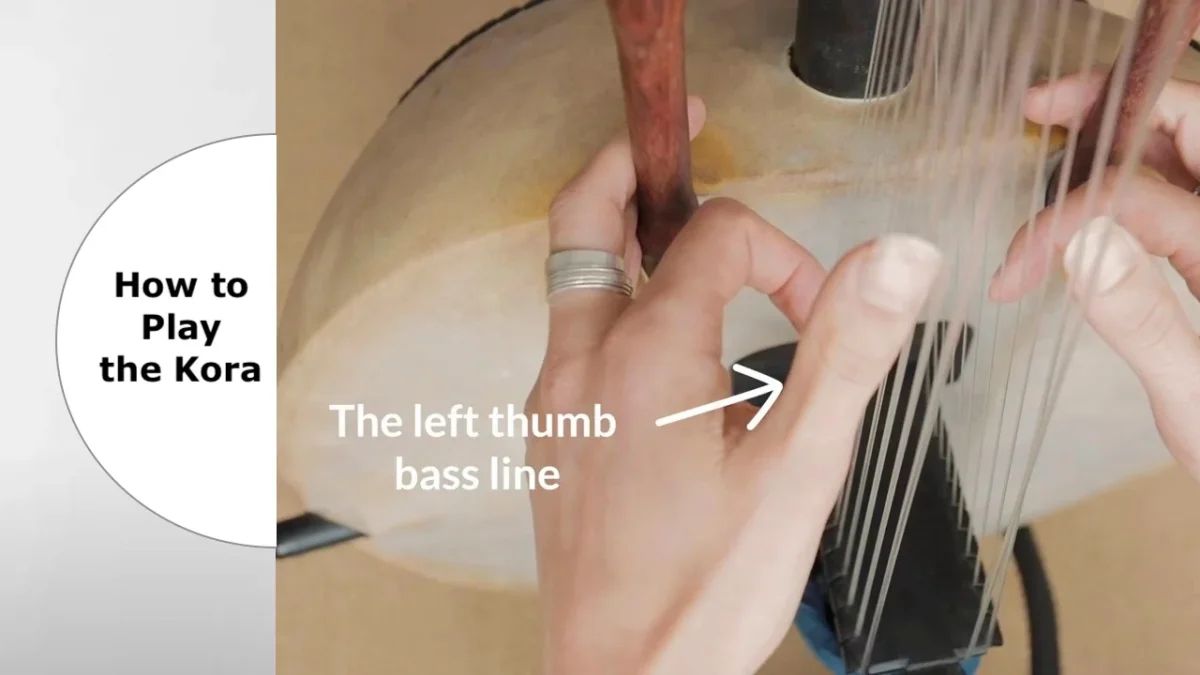
The left thumb establishes the rhythmic foundation called “kumbengo” in traditional Mandinka music. This repetitive bass pattern runs underneath all melody work, similar to a guitar’s rhythm pattern or a bass player’s foundation line.
Most kora bass patterns involve two or three alternating strings played in steady rhythm. The most common beginner pattern uses these strings alternating in quarter-note rhythm. I recommend starting by practicing just this pattern until it becomes completely automatic, then adding melodic elements.
Play your left thumb bass pattern slowly and deliberately. Aim for 60-80 BPM initially (beats per minute). Many beginners rush this pattern, and speed develops naturally once accuracy becomes reliable. Speed comes later; accuracy comes first.
Right-Hand Melody Approach
Your right hand plays two distinct roles: your right thumb carries the melody while your right index finger adds improvisation and fills. This separation allows simultaneous rhythm and melodic flow, creating the characteristic kora sound.
The right thumb follows simple melodic patterns using 3-5 notes from traditional West African scales. Begin with pentatonic patterns (five-note scales) common in Mandinka music. These patterns create the warm, soulful quality you hear in authentic kora recordings.
The right index finger plays freely between melody notes, filling space with short runs and flourishes. This improvisation layer adds texture and variation to otherwise simple patterns. Don’t overthink this initially; let your finger respond naturally to the bass rhythm and melody.
| Hand Role | Fingers Used | Primary Function | Typical Pattern Type |
|---|---|---|---|
| Left Hand | Thumb only | Rhythmic bass foundation | Two-string alternation pattern |
| Right Hand (Thumb) | Right thumb | Primary melody line | 5-8 note repeating pattern |
| Right Hand (Index) | Right index finger | Improvisation and texture | Free variation and fills |
| Stabilization | Remaining four fingers | Hold hand posts firmly | Static grip for stability |
Kora Tuning Systems and Scale Selection
Tuning profoundly affects your playing experience and learning progression. Different West African regions developed distinct tuning systems, and understanding these systems helps you grasp traditional kora music structure.
The Four Traditional Tuning Systems
West African kora has four primary tuning systems associated with different geographic regions: Senegal, Mali, Guinea, and Guinea-Bissau variations, each producing distinct tonal characteristics. Most beginner koras come in one tuning, typically a Senegalese-style tuning that works well for learning.
The tuning system determines which strings produce which notes and which regional musical patterns become accessible. Learning one tuning system thoroughly establishes your foundation, allowing you to explore other tunings later.
Understanding Kora Tuning Rings and Adjustments
The kora uses leather tuning rings called “konso” positioned along the wooden neck. Moving these rings up or down the neck raises or lowers the pitch of their associated strings. This system allows retuning into different modal scales.
Each string’s tuning ring starts in a specific position. To tune your kora, slide the leather ring up to raise the pitch slightly, or down to lower it. I recommend adjusting one string at a time, checking your progress with a digital tuner or smartphone tuner application.
Patience is essential during tuning. The leather rings sometimes slip slightly during playing, so expect to re-tune periodically during your first weeks of learning. This is completely normal and improves as your fingers learn proper technique that minimizes string tension fluctuations.
Modal Scales and Melodic Patterns
Traditional kora music uses pentatonic (five-note) and heptatonic (seven-note) scales distinct from Western major and minor scales. Understanding which notes compose your current tuning system helps you improvise confidently and understand traditional melodies.
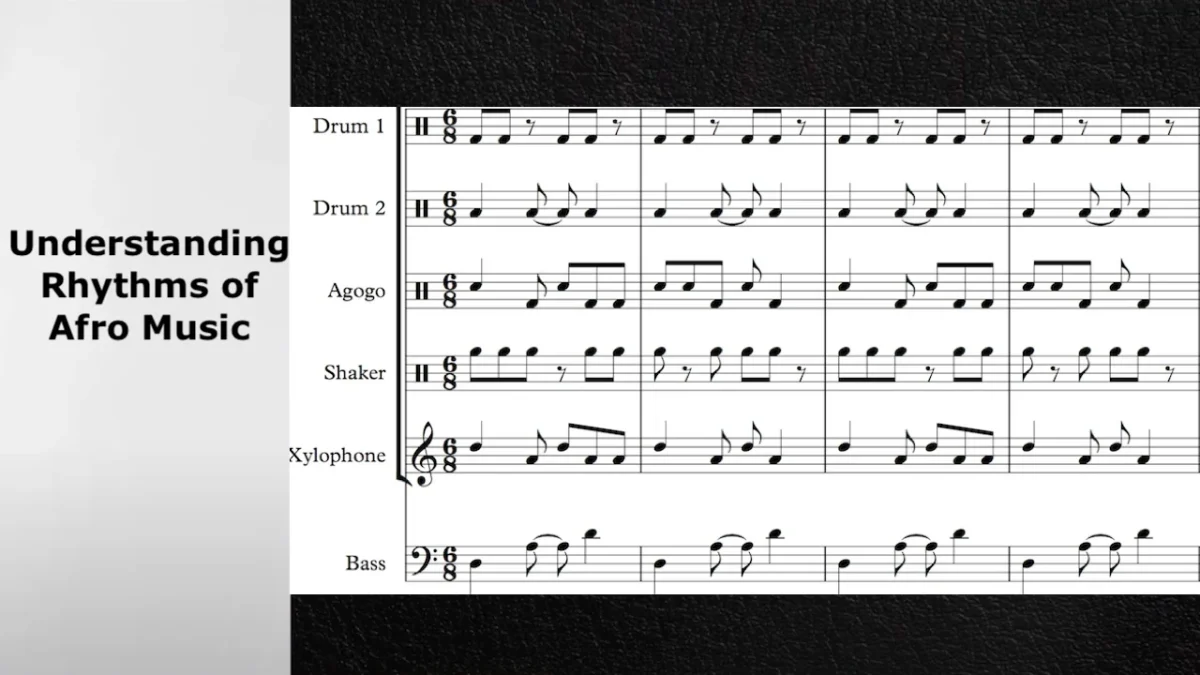
I recommend learning by ear initially rather than reading sheet music. Traditional kora music passed through oral transmission for centuries; learning patterns through listening honors this heritage while developing your musical ear more effectively than reading notation.
Your First Week of Kora Playing: Progressive Lessons
Many beginners attempt complex pieces immediately and become discouraged. I structure learning progressively, building confidence and technique gradually through manageable steps.
Day 1-2: Hand Position and Bass Pattern Only
Hold your kora and position your hands correctly for 20-30 minutes daily. Practice the left-hand bass pattern using only your left thumb, aiming for steady quarter-note rhythm at 60 BPM. Don’t add melody yet. This foundation matters more than progressing quickly.
Your goal is comfort and accuracy with hand position, not speed. Repeat the bass pattern continuously for 15-20 minutes, resting when you feel fatigue. Rest is as important as practice; pushing through fatigue develops tension and bad habits.
Day 3-4: Coordinating Both Hands in Basic Pattern
Once your left hand feels comfortable, add your right thumb playing the simplest melodic pattern available in your tuning system. Many beginner patterns use 3-4 alternating notes, creating a basic two-part arrangement with bass and melody.
Practice this basic two-hand pattern very slowly, around 60-70 BPM. Accuracy trumps speed completely at this stage. You’re building the neurological patterns that later allow faster playing.
Day 5-7: Adding Right-Hand Improvisation
Once your basic two-hand coordination feels solid, add your right index finger playing freely between melody notes. This finger doesn’t follow a strict pattern; instead, it responds to gaps in your right thumb melody, filling space with short runs and flourishes.
Start by playing single notes between your right thumb melody. As confidence grows, add short two or three-note runs. This improvisation layer feels intimidating initially but develops naturally through playful experimentation.
Building From Simple Patterns to Traditional Pieces
After your first week of basic coordination, you’re ready to explore actual traditional kora repertoire. This progression requires understanding different pattern types and how they combine.
Ostinato Patterns: The Kumbengo Foundation
Ostinatos are repeated rhythmic-melodic patterns that serve as the anchor for kora pieces, supporting improvisation and variation throughout the performance. Most traditional pieces build around 2-4 core ostinato patterns that repeat for extended periods.
I recommend learning “Kelefa Ba,” one of the foundational pieces in kora repertoire. This piece uses straightforward ostinato patterns accessible to beginners while teaching authentic Mandinka musical concepts. The piece demonstrates how simple repeated patterns create the mesmerizing quality of traditional kora music.
Improvisation Within the Pattern: Birimintingo
Traditional kora players maintain their base ostinato pattern while improvising elaborate variations called “birimintingo” over the top. This simultaneous repetition and improvisation defines kora’s appeal.
Practice maintaining your ostinato pattern perfectly while adding variations through your index finger. Start with very simple variations: adding or removing notes, rearranging your improvisation figure, varying rhythm slightly. The goal is stability in your foundation combined with freedom in your improvisation.
Transitioning Between Different Patterns
Professional kora performances flow between different piece patterns and improvisational sections. Learning smooth transitions between patterns prevents jarring shifts that interrupt the music’s flow.
Practice transitions by playing Pattern A for 8-16 repetitions, then cleanly shifting to Pattern B while maintaining tempo. The challenge is keeping time perfectly during the shift without breaking rhythm. Use a metronome to maintain steady tempo while you focus on clean pattern transitions.
Common Mistakes That Sabotage Beginners
Mistake 1: Rushing Tempo Before Accuracy Students constantly accelerate tempo before mastering correct technique and finger positions. This develops sloppy habits that prove difficult to correct later. Always prioritize accuracy at slower tempos over faster playing with errors.
Mistake 2: Tensing Your Hands and Shoulders Tension in your grip or shoulders prevents relaxed playing and causes fatigue that ends practice sessions prematurely. Tension also restricts finger movement and makes playing feel physically difficult. Practice in short sessions, resting whenever you feel tension building.
Mistake 3: Ignoring Left-Hand Foundation Beginners often neglect the left-hand bass pattern, focusing exclusively on right-hand melody. The bass pattern is equally important; a solid foundation allows melodic freedom. Dedicate practice time specifically to left-hand patterns.
Mistake 4: Expecting Rapid Progress Kora requires patient, gradual development. Progress measured in weeks or months discourages beginners expecting faster advancement. Accept that solid progress arrives through consistent practice over extended periods.
Mistake 5: Not Tuning Your Instrument Properly A poorly tuned kora sounds unpleasant regardless of your playing technique. Invest time learning proper tuning. A properly tuned kora encourages continued practice through rewarding sound quality.
Kora Playing Technique: Hand Movement Details
Proper technique prevents injury and enables advancement to complex pieces. Many learners develop inefficient movements that limit later progress.
Wrist and Arm Movement Mechanics
Plucking motion originates from your wrist and hand, not just your fingers. Your fingers curl toward your palm, with the plucking motion coming from hand extension. This distributes effort across multiple joints rather than concentrating stress on your fingers.
Your wrist naturally flexes slightly as you pluck, assisting the finger movement. This wrist contribution creates smooth motion that feels effortless once developed. Beginners often try playing with rigid wrists, creating tension that causes fatigue and limits speed potential.
Proper Nail Plucking vs. Fingertip Plucking
Authentic kora technique uses your nail edge for plucking, not your fingertip, creating a sharper attack and clearer note definition. Fingertip plucking produces a softer, less articulate sound that sounds muffled compared to nail plucking.
Maintain your nails at a length where they extend just slightly past your fingertips. This length works perfectly for kora plucking without requiring special preparation. Shorter nails reduce tone clarity; longer nails catch on strings awkwardly.
String Angle and Contact Point
Your plucking motion should approach strings at an angle perpendicular to the string length, not parallel. This perpendicular approach provides optimal mechanical advantage and creates clean separation from the string. Parallel approaches produce muffled, weak-sounding notes.
Contact each string at roughly the same distance from the bridge (6-10 inches away). Varying contact point distance significantly affects tone quality. Closer contact produces brighter tone; further contact produces warmer tone. Consistency develops better sound than chasing different tone colors.
Finger Strength and Stamina Development
Kora playing builds specific finger and hand strength that takes time to develop. Patience through this phase prevents injury and creates sustainable playing habits.
Building Finger Endurance
Practice sessions should start around 20-30 minutes and gradually extend as your hand strength develops. Adding 5-10 minutes weekly feels sustainable without causing injury. Consistent daily practice for 30-45 minutes proves more effective than occasional marathon sessions.
Stop practicing immediately if you feel sharp pain (distinct from normal muscle fatigue). Sharp pain indicates improper technique or overuse. Rest, examine your hand position, and resume at slower tempo once you’ve identified the problem.
Preventing Repetitive Strain
Repetitive strain develops gradually through accumulated tension and improper technique. Prevention matters far more than treating strain after it develops. I recommend these strategies: take 2-3 minute breaks every 20-30 minutes, maintain proper hand position throughout, stretch your hands gently before and after practice, avoid rapid temperature changes that affect finger dexterity.
Learning Traditional Pieces: Beyond Basic Patterns
Once you’ve mastered basic technique and simple patterns, traditional piece repertoire opens up. These pieces teach authentic Mandinka musical concepts while providing structured material for continued advancement.
Essential Beginner Pieces for Kora
The piece “Kelefa Ba” teaches foundational Mandinka concepts while remaining accessible to beginners with a few weeks of practice. This piece combines straightforward ostinato patterns with opportunities for improvisation, demonstrating how professional players build complexity from simple elements.
Other accessible beginner pieces include basic jali accompaniment patterns used to support singing or storytelling. These pieces require less technical virtuosity than solo performance pieces, making them ideal for developing secure technique before attempting complex material.
Oral Transmission and Listening-Based Learning
Traditional kora music passed through generations via oral transmission rather than written notation. Learning by ear develops musical listening skills while honoring this heritage. I recommend listening to recordings of professional kora players, isolating specific patterns you hear, then replicating them on your instrument.
This listening-based approach feels slow initially compared to reading sheet music, but it develops superior musical ear and deeper understanding of how patterns actually sound in professional performance.
Kora Amplification and Modern Performance Considerations
While traditional kora is acoustic, modern performance contexts sometimes require amplification. Understanding basic amplification helps you navigate contemporary performance situations.
Microphone Placement and Technique
Acoustic microphone placement 6-12 inches from the calabash resonator, angled toward the strings rather than directly perpendicular, captures optimal tone balance. Position the microphone to avoid breath noise or fabric rustling sounds that become magnified through amplification.
During performance, maintain consistent distance from the microphone by keeping your instrument position stable. Moving closer or further away during playing creates volume fluctuations that distract listeners.
Electronic Pickups and Internal Amplification
Modern koras sometimes include piezoelectric pickups that mount internally on the bridge or calabash. These pickups capture vibrations directly from the instrument, providing clean amplification without microphone feedback issues common in acoustic miking.
Internal pickups require minimal additional equipment and work reliably in varied performance environments. If you plan extensive public performance, consider purchasing a kora equipped with internal amplification.
Frequently Asked Questions About Playing Kora
With consistent daily practice of 30-45 minutes, most learners can play a simple piece like “Kelefa Ba” acceptably within 4-8 weeks. Professional-level performance requires months or years of dedicated practice. Progress depends entirely on practice consistency rather than raw talent.
Absolutely. Left-handed players simply reverse hand assignments: left hand handles melody while right hand handles bass. The learning process remains identical; only hand positioning flips. Many professional kora players are naturally left-handed and adapted the instrument to their preference.
Kora presents different challenges than guitar or piano rather than being objectively harder. The initial learning curve feels steeper because kora lacks the visual fretboard reference that helps guitarists or the standardized keyboard layout pianists rely on. Once hand position becomes automatic, progress feels more natural than many other instruments.
Quality matters significantly for beginner motivation. Cheap tourist koras with poor sound quickly discourage practice. Mid-range student instruments costing 500-1000 euros offer excellent sound quality and durability for serious learners. Investing in quality instruments increases your likelihood of sustained practice and more rapid progress.
Daily practice of 30-45 minutes proves far more effective than occasional longer sessions. Daily practice builds consistent neural pathways and muscle memory that occasional practice cannot develop. Three-times-weekly practice produces noticeable progress; anything less shows very slow advancement.
Yes. Online video tutorials, recorded demonstrations, and online instruction from experienced teachers make learning kora possible anywhere globally. While studying in West Africa with master players provides immersion benefits, dedicated practice with quality instructional resources develops solid technique anywhere.
The Keur Moussa notation system, created in the late 1970s by Brother Dominique Catta, became the standard for writing kora music. This system uses a single treble clef with numeric notation for lower notes, simplifying traditional grand staff complexity. Many beginner instructional materials use this system, making it a logical choice for learners.
Advancing Beyond Beginner Level: Next Steps in Kora Mastery
Once you’ve mastered basic patterns and can play simple pieces, several advancement paths open depending on your musical interests.
Many learners transition toward performance-focused development, learning larger repertoires and developing personal interpretive approaches. Others pursue deeper technical study, exploring advanced improvisation techniques and the four traditional regional tuning systems. Some players combine kora with other West African instruments like balafon or talking drums, creating ensemble musical contexts.
The key to advancement is finding a clear musical goal that excites you. Whether performing for audiences, creating recorded music, collaborating with other musicians, or simply deepening your personal practice, having specific goals maintains motivation through the months and years of development required for advanced proficiency.
Consider studying with an experienced kora teacher when you’ve reached intermediate skill level. Teachers provide personalized feedback on technique, introduce you to traditional contexts for kora music, and accelerate your advancement beyond self-teaching limitations. Many experienced kora players offer online lessons, making mentorship accessible regardless of your location.
Start your kora learning journey today using these techniques and principles. Visit Mp3Juice for additional West African music resources, traditional recordings, and learning materials supporting your development into this ancient, rewarding instrument.